Adorable handmade items from Kenzington Collections!
This site http://hyenacart.com/kenzingtonkollections/ has some of the most adorable handmade items for your children! My personal fav is her interchangeable headbands…she has created these super comfortable bands that have an opening for the floral clips to slide right in to. Such a great way to be able to change out the look for any outfit! She is so creative and will make anything custom for you so don’t be afraid to ask! Here are just a few pictures of some of her work.
Freshen up that boring office!
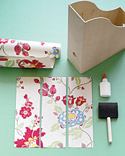
A little pattern goes a long way! This is such a great way to take those average magazine holders and give them new life with a fun and fresh wallpaper.
All you have to do is follow these simple steps:
Step 1: Trace the tall back panel of a magazine holder onto cardboard, and cut out.
Step 2: Using that template as a guide, trace 1 panel for each holder onto a width of decorative wallpaper (floral and geometric prints work best). Cut out.
Step 3: Squeeze craft glue onto the back of a magazine holder, and spread evenly with a sponge brush. Align paper with the back panel of the holder, and affix, smoothing out air bubbles as you go.
Step 4: Repeat with remaining paper and holders. File issues chronologically, and arrange the holders on a shelf to re-create the wallpaper’s design.
What you’ll need:
Shamrock Party Accessory!
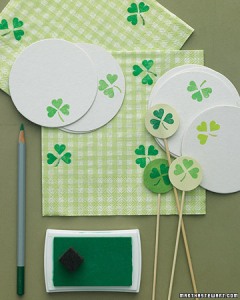
Happy St. Pattys Day everyone!! Here’s a quick and easy way to spice up your table and add a little luck 🙂
Rinse the pink ink from a heart-shaped rubber stamp, and use it (and a green ink pad) to add shamrocks to napkins, coasters, and more. To make a swizzle stick, stamp a clover pattern onto card stock, and draw a stem with a colored pencil; repeat. Cut out with a 1-inch circle craft punch. Glue circles together, back sides facing, onto a skewer.
Nursery Room DIY Project!
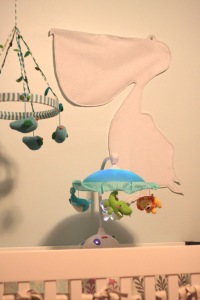
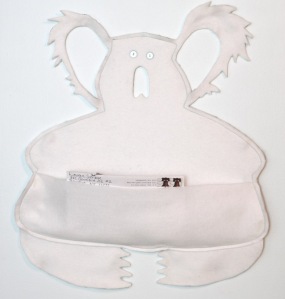
A few months ago I made these for a nursery room. They are made out of felt so it gives you a worry free decor item to put above the crib 🙂 The koala was placed over the changing station and is used to hold the diapers!
What you’ll need:
- 1/2 yard of felt (per animal)
- scissors
- sewing machine
- buttons for the eyes
- needle and thread
Step 1:
Place 2 layers of felt on top of each other and cut out your desired animal. (I drew mine freehand but those of you who might need a little more guidance you can try to find animal templates on google images.)
Step 2:
Place pins around the entire edge of the animal and then sew together the 2 layers with contrasting thread that goes with your color scheme. (if you are making the koala you’ll want to leave the top of the pouch open, and if you’re making the pelican you’ll want to not sew around the top of the beak so you have a storage pocket there as well)
Step 3:
Add the eyes by hand sewing buttons through the felt.
Step 4:
Now you’ll want to add small metal hooks to the back of the animal so you can hang him. You can find these at your local fabric store.
Spice up your aisle!
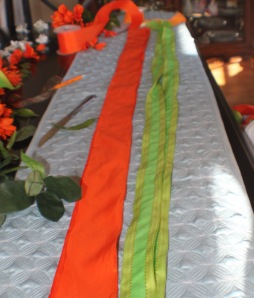
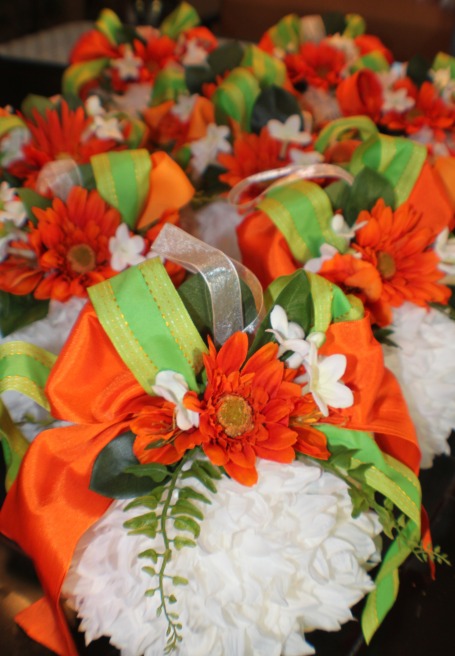
We’ve all seen a wedding with the flower balls running along each side of the aisle. Here is a great way to give those a new look and incorporate your wedding colors as well!
Here’s what you’ll need:
1. Hooks for aisle way http://www.save-on-crafts.com/ironstand.html
2. Paper Balls – These can be a variety of different types, these are what I used http://www.save-on-crafts.com/fluffyball.html
3. Glue gun
4. Variety of silk flowers
5. Ribbon
Step 1:
Lay out all of your materials and count out how many flowers and leaves you will have per ball.
Step 2:
Pull off the flowers/leaves from their stems so they will easily attach with glue.
Step 3:
Cut your ribbon to size. Mine were cut to about 36″ long.
Step 4:
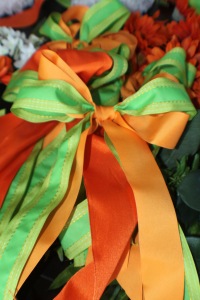
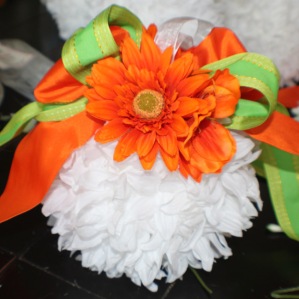
Start by taking your pre made bows and glue it to the top of the white ball. I used 2 different types of ribbons and combined them for my bows.
Step 5:
Then begin to glue on the largest flowers that you want to add to the balls and place those in the middle. Start adding smaller flowers to each side almost behind the larger flower.
Step 6:
Fill in with leaves and trailing greens underneath your flowers. Make sure you have glued everything down with your hot glue gun and you’re done!
The wedding that I made these for isn’t until July so i’ll send you pictures of them in action this summer!
Flower Pens for All Occassions!
These flower pens are really easy to make and add color to any table! You could use these for your sign in book at your wedding or just to keep in your pen holder at home!
Here are the supplies you will need:
1. Bag of pens
2. Silk flowers of your choice
3. Flower tape (found at your local craft store)
Step 1:
Remove top from end of pen and remove the stem from the flower and insert the flower into the tube of the pen. You may want to attach the flower with a glue gun to make sure it stays in place.
Step 2:
Start just under the flower at the end of the pen and begin to wrap the green floral tape around the pen until you reach the bottom and cut your tape!
Now you’re ready to display your pretty little pens! I like to keep mine in a vase with sand…this is a great way to show them off and looks cute too! 🙂
Laguna authors introduce “Molly and Wally Molecule” | science, book, adler – News – The Orange County Register
This is a new book from a friend of mine Christine Adler. I am so proud of you Christine! This is such a great accomplishment and will provide parents with a fun way of teaching their children!
Posted using ShareThis
Freshen up your altar!
I saw this and thought it was such a great way to create a unique and different altar for your wedding or create a focal point at your next party! It would also be great to frame out a beverage station as shown below. Here’s a site that sells them in bulk for a great price http://www.bulkpartysupplies.com/store/c/5011-Party-Garland.html
The Atomic Spa
This spa in Milan, Italy has to be one of the most interesting and elaborate gyms ever! I would go to the gym just to enjoy the unique atmosphere!
Simone Micheli Architectural Hero
project Atomic Spa Suisse, Milan.
standout Huge bubbles of chromium-plated plastic emerge sporadically in the entry, then multiply as they meet their literal match above the swimming pool.
photography Jürgen Eheim.
What do you with those plastic bags filling up your pantry!?
This is such a simple way to get the cluttered plastic bags of the shelf! We all end up with plastic bags from the store and this is a great wayto keep them organized and re-use them!
Tools and Materials
15-inch-wide dish towel (ours has a 1/2-inch hem)
Pins and scissors
10-inch strip of 3/4-inch twill tape
7 1/2-inch strip of 1/4-inch elastic;
1 1/2-inch safety pin
Plastic Bag Organizer How-To
Fold dish towel in half lengthwise, wrong side out; pin along the edge that’s opposite the fold. Pin twill-tape ends to one open end to form hanger.
Sew a seam 7 inches from the folded edge to make a tube. Stitch twill tape in place.
1. Twill tape hanger
2. Folded edge
3. New seam
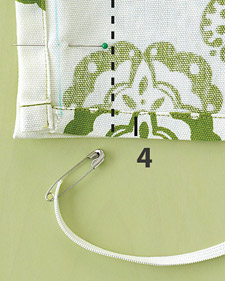
Thread elastic through the towel’s existing hem: Snip one small slit in the towel’s hem (shown, right). Flip tube over and repeat, making a second slit. Tie a large knot at one end of elastic; attach safety pin to other end. Slide safety pin through 1 slit, and ease through hem and out other slit. Tie elastic ends to gather. Turn bag right side out.
4. Snip line
From Martha Stewart Living, June 2009


